
Optio has a unique way of choosing terrain for a battle. Instead of throwing dice and invoking the favour of the gods who drop forests and hills down from the heavens, the players do a 5-15 minute pregame where they exercise an important skill that real generals needed - operational manoeuvring.
When two armies approach each other, a general worth his salt sent out scouting parties to find out where his opponent was (since he didn't have satellites and drones to do that recon for him). At the same time he moved his army towards terrain that, as far as possible, suited it. The idea was to catch the enemy on terrain that put it at a disadvantage, but that was a counsel of perfection. Most of the time generals agreed to fight on terrain that gave them at least equal chances.
In the pregame there is an operational map divided into large map squares, each subdivided into smaller terrain squares (8 x 8 terrain squares for each map square). Each player has a number of blocks - one representing his army, two his scouts and four acting as dummies. Each block has an image on one side indicating what it is, and that image faces the owning general. Each player can have two of his own blocks per square, but up to two of his blocks can move into a square occupied by one or two enemy blocks. Blocks may move one square per turn but not diagonally. They may also not move if the player so chooses.
Scouts and the army block can reveal the identity of an enemy block if both are in the same square. The player's scout/army block is turned so its image is face upwards, and the opponent must turn his own block so the image is face upwards, revealing its identity. If the block is a donkey - i.e. a dummy - it is removed. If the block is a scout or general is remains with the image face upwards.
A player may reveal his own army at any time. Once both armies are revealed they must subsequently move closer to each other - i.e. take a path that eventually meets in the square of the opposing army. Each player however has 6 kudo counters. He can spend one kudo and either not move his army or move it further away from his opponent. Once he runs out of kudos he is obliged to move closer to his opponent each turn.
Once an army moves into a square occupied by his opponent's army, that square is used to determine terrain for the battle. More of that below.
For now, here's a sample pregame.
I have three terrain maps: dense, medium and open. I threw a die (!): 1-2 for open, 3-4 medium and 5-6 dense. We got open, which favoured Carthage's cavalry superiority. I was going to have to be careful.
I was Rome (green), Peter was Carthage (red). We used dice (all these dice!) to decide who moved first, which turned out to be me. The fairly compact collection of woods to the bottom right quarter of the map would give Rome useful places to anchor her infantry's flanks against Peter's cavalry. I decided to make sure my army fought somewhere there. Difficult to see the images so I've ringed my army in red and my scouts in green. My scouts would flank my army and reveal anything that came near it.

Peter then deployed his blocks. Where was his army?

I forgot to photograph Peter's next move so here's both our moves together. Time to move everyone up.

I moved up four blocks - my scouts on the flanks of my army which hung back in the favourable terrain.

Peter moved everyone up but no attempts by scouts or army to reveal any of my blocks yet.

My own scouts however got busy, revealing two dummies that were removed. My other blocks moved around trying to look important and distract attention from my army block.

Peter did a lot of shuffling but remained coy about revealing his scouts.

I was not so coy, using my scouts to reveal another dummy and one of Peter's scouts. My army kept well away from the action.

Peter used his other scout to reveal one of my dummies.

I was determined to find his army and kept my remaining dummies on the move to escape detection for as long as possible.

Peter was also on the hunt for my army.

Let's have a look at that block nearest to my army.

It can run but it can't hide forever.

Come on. What are you?

Peter corners one of my own blocks.

...and then, oddly enough, decides to reveal his own army. In my turn I reveal one of his dummies and my remaining dummies faddle around to keep Peter guessing (but why did he reveal his army?).

Peter reveals another of my dummies and starts closing in on my army. Does he begin to suspect where it is?

Since I knew where his scouts and army were, no point in keeping my scouts on the map, so I removed them, and moved my army as far into the good terrain as I could whilst the dummies flapped around saying look at me!

Peter's army wasn't budging and his scouts were getting near, so I decided no point in waiting any longer and revealed my army. I would have to hope he come to me and not force me to meet him in the middle of the board where the open terrain gave me no advantages.

With both armies revealed, all other blocks are removed. Peter began his advance towards my army.

I did likewise. We would have to keep approaching each other unless we were willing to spend a kudo to do otherwise.

On he comes.

And on come I.

He keeps approaching.

Now I decide to spend a kudo and move away from the Carthaginian army into the favourable terrain, hoping he'll keep coming - and not spend kudos in his turn to outwait me.

He keeps coming. Good!

I move towards him. That square between us has possibilities....

Peter also decides he likes the battlefield square and enters it.

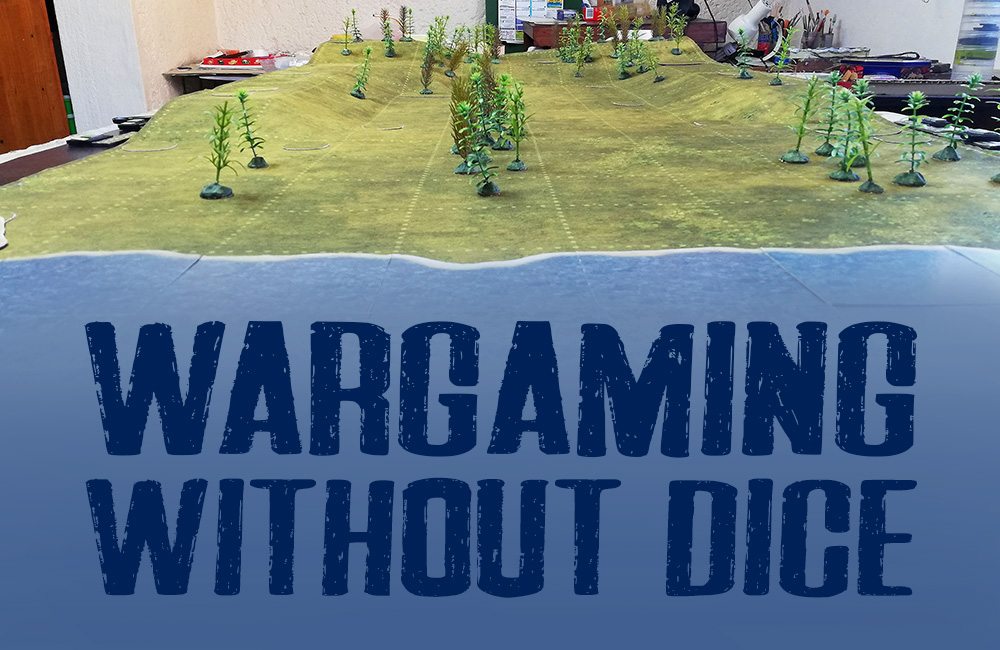
OK. Let's fight there. Since I entered a battlefield square already occupied by Peter that made him the defender. A template 8 terrain squares deep and 16 terrain squares wide is centred over our battlefield square. It can then be moved by the defender one terrain square in any direction. Peter decides to move it one terrain square towards him and that becomes our battlefield.

The clumps of woodland on my left, right opposite the woodland at Peter's side of the battlefield, gave me an idea. I decided I would use them in a way that Peter would not anticipate. Report to follow soon. 🤞

No comments:
Post a Comment