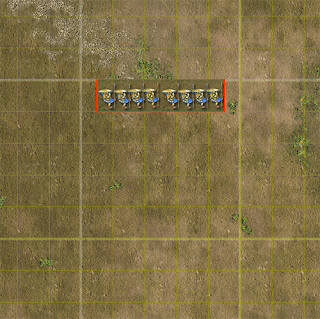
The time has come. After a long siege the Dorian capital Amphissa is on the verge of surrender, its citizens half-starved and desperate. But hope is rekindled: the illustrious general Ophonahos finally arrives with his relief army and deploys for battle, ready to crush that impudent upstart Attalos once and for all....
The two armies ready for battle, Ophonahos (Peter) on the right and Attalos (Yours Truly) on the left.

Turn 1. Malis. Turn 1. Doris
Attalos' command rating was inferior to Ophonahos' which means I started deployment and hence should start moving, but I decide to forego my move and see what Peter is up to. Peter decides to advance his hoplites and peltasts, holding the rest of his army back - possibly to see what I was up to (we really don't trust each other 😟).

Turn 2. Malis
I start executing my plan conceived during deployment: move my psiloi up in front of my hoplites from where they can shoot and weaken Peter's hoplites, whilst my cavalry moved up on my right to engage Peter's psiloi and hopefully distract his cavalry.

Turn 2. Doris
Peter now makes his big move, essentially moving everything towards my infantry on the left. His psiloi form column and double-march into the protection of the forest, whilst his cavalry move up to support his hoplites poised to attack my infantry line. His peltasts move onto the ploughed field and trade javelins with my psiloi. I have to admit this move gave me serious pause for thought.

Turn 3. Malis
Only one thing to do: carry on with the original plan. I needed to close the gap between my hoplites and the city walls so moved the entire infantry battleline to the right, which not only stopped any attempt by Peter's peltasts to infiltrate into my rear, but also stopped his cavalry from sneaking around me - a solid wall of ZOCs now blocking them. They would have to go the long way round his hoplites, and with my cavalry moving up towards his left I doubted he would have time for that.
Notice my psiloi getting out the way as the hoplites occupy their square. Psiloi must evade friendly as well as enemy non-lights. The psiloi did manage to shoot the peltasts before they moved (who naturally shot back at them).

Turn 3. Doris
Peter decided a frontal assault was the way to go, moving his hoplites diagonally left to support his peltasts. His cavalry formed line to face the threat of my cavalry on the far side of the town, and his psiloi formed line to add to the welcoming committee.

Turn 4. Malis
Time to drive on Peter's army from the front and flank. Here I inadvertently broke a rule - my hoplites charged the enemy before them, but since my peltasts were part of the same battleline they should have charged as well, which they didn't do. This would have made a big difference as peltasts are easily outfought by hoplites and the loss of that unit would have exposed my hoplites to outflanking. There ya go Peter, you should really have won this battle.
Peter showed extraordinary bad luck in his dice throwing: a first six for his hoplite commander was followed by a second, killing the commander. This isn't the first time it would happen in this game....
Peter's peltasts evade the charge which is exactly what I was hoping for. They are now in the path of my advancing cavalry.

Turn 4. Melee
Here I got turn order mixed up. I move first, followed by Peter, so melee should have come after Peter's move. Oh well. The hoplites wear each other down but nobody routs just yet.

Turn 5. Doris
Peter charges my peltasts who evade, and reforms his own evaded peltasts. But nothing else for this turn. Mistake.

Turn 5. Malis
Chaaarge! In go my light horse who catch Peter's peltasts on the flank. With their own LH in the way they can't evade and have to take it on the chin. Peter elects to let his other LH accept the charge and not evade. My general's combat factor however is better than his, so I win the first round of charge combat (mounted vs mounted combat is resolved twice with generals/commanders affecting one round of combat). Peter's LH drops a morale interval.

Turn 5. Melee
In the subsequent melee combat Peter's LH drops an additional two morale intervals and routs. I realise I forgot to resolve the melee combat between my LH and Peter's peltasts. Damn.

My LH occupy the square vacated by Peter's routed LH.
Turn 6. Doris. Turn 6. Malis.
Peter didn't move this turn. I turn my hoplites - possible since they have enemy on their flank - to face Peter's hoplites and prepare for a flank charge next turn. Meanwhile my psiloi form column and march up as far as possible.

Turn 6. Melee
Peter's peltasts finally turn to face my LH and, having been disordered by the flank charge, do badly in the melee but aren't routed just yet. Both our commanders however are wounded.

Ouch!

Turn 7. Doris
Peter pulls a fast one, slipping his LH between my LH and his peltasts to the rear of my other LH unit engaging them. I sure didn't see that coming. His psiloi advance from the woods to get back into the battle. Meanwhile his hoplites charge my peltasts driving them back and - hopefully - eventually off the battlefield.

Turn 7. Malis
My psiloi battle column forms line, then one of the units advances up to shoot at Peter's hoplites (the other can't move so stays where it is). My hoplites charge Peter's hoplites in the flank, disordering them. Meanwhile my general's LH moves at top speed to engage Peter's LH, about to make a burger patty of my engaged LH.

Turn 7. Melee
Peter's hoplites finally break and run whilst his disordered peltasts are ground down but not yet routed.

Turn 8. Doris
Peter's psiloi enter the fray again, shooting up my hoplites. More importantly, his LH charge my LH in the rear, disordering them and inflicting ruinous morale loss in the charge combat, though not quite enough to rout them. Meanwhile my peltasts and psiloi throw everything they have at Peter's hoplites....

.... who charge the peltasts. But this time they stand their ground. The hoplites are shaken, so the charge combat is a draw and nothing happens.
Turn 8. Malis
One of my hoplite units charge Peter's psiloi, who evade. The other turns to face the other psiloi unit who continues to give a generous donation of javelins. But my hoplites are armoured so it's not too bad. My LH gets to the rear of Peter's engaged LH and prepares to repeat the hamburger patty trick next turn.

Turn 8. Melee
Sandwiched between peltasts and LH, my engaged LH unit dies, fast. Oh well, the bards will compose a stirring ode in their memory.

Turn 9. Doris
Peter rotates his LH 180 degrees to face mine and moves up his peltasts to give support. His psiloi continue to shoot up my hoplites, slowly denting their morale. Slowly.

Turn 9. Malis
Chaaaarge! My hoplites obliged Peter's psiloi to evade and then my LH charge Peter's LH and....
O tempora, O mores! General Ophonahos is killed in hand to hand combat with Attalos! Two consecutive sixes do him in, on the spot. His loss is worth 4 victory points and that is enough to tip Peter's army over the edge in a general rout. Game over!
But hang on, the game was decided by a throw of the die. That isn't how Optio is supposed to work....
The womenfolk wail from the city walls. Our hero, our saviour, is dead! Eheu!
This was an average victory for Malis since I had lost more than a third but less than two-thirds of the stands necessary to rout my own army. Peter hence lost three kudos and I gained three. In consequence he lost control of two towns: Cynus and Potidiana. Things now look truly desperate for Doris but it isn't over yet. By taxing his three non-capital towns (a player cannot tax his capital) Peter was just able to raise an army that matched mine. Time for one last throw of the die (!). Stay tuned.


