This is the one battle that really puts every ruleset through its paces. The Carthaginian infantry wedge that gives way without the Carthaginian centre disintegrating. The Gallic and Iberian cavalry that rout the Roman cavalry, move to the other side of the battlefield and help rout the Allied cavalry before rear-ending the legions. The Libyan infantry that gift wrap the legions on both flanks. Can any game replicate all that in a way that is convincing?
I think I managed to pull it off.
I did an article on the battle for Slingshot some years back and applied my research to this game. Reading the primary sources carefully, I came to several conclusions:
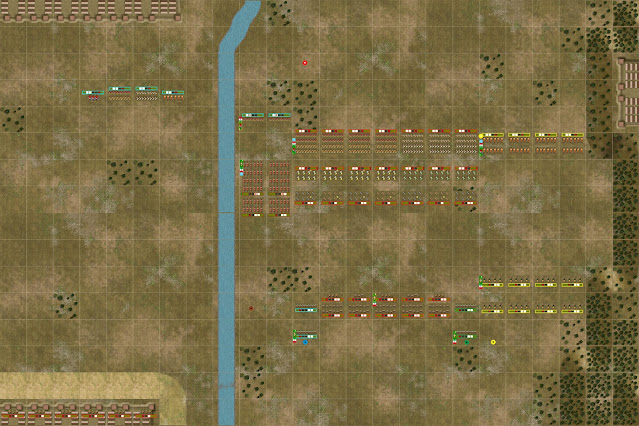
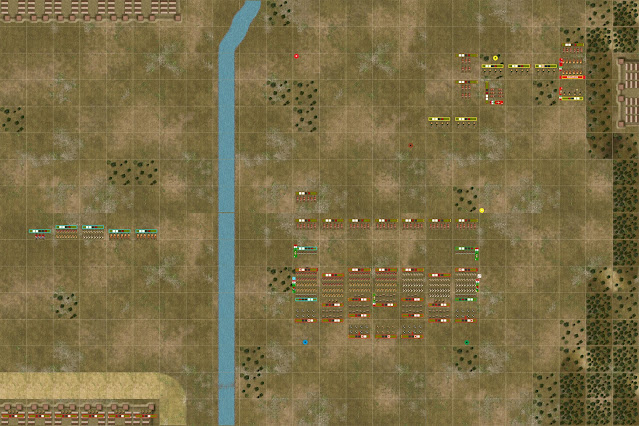
- The battle took place right by the Roman town of Cannae but the Aufidus river flowed further to the west in that era, giving a battlefield width somewhat under 3km for the armies to deploy in.
- The Carthaginian centre deployed in two lines (Livy is clear there was a second line behind the thin Gallic/Iberian infantry wedge).
- The Libyan troops likewise deployed in two lines, the front line to fix the flank legions in place and the second line to march around and rear-end them.
- The Romans deployed two legions with attached cavalry on the other side of the Aufidius to prevent a Carthaginian flanking manoeuvre around the Roman right.
- Possibly, the Numidian cavalry deployed in two lines, since the sources speak of Numidian cavalry closing off the rear of the legions whilst still engaged with the Allied cavalry, which could happen only if some of the Numidian horse were free to rear-end the legions.
- The Roman and Allied cavalry deployed in considerable depth, which should have negated any Carthaginian numerical superiority in cavalry since the greater Carthaginian depth wouldn't have helped the cavalry formations, but Hannibal had an answer for that.
I assumed that Hannibal sat back and let Rome make the first move, so
Turn 1. Rome.
The steamroller starts grinding forwards. The 2 legions on the other side of the Aufidus are uncommanded so move more slowly, ½ a square per turn. Maybe they should have had their own commander but I'm playing this by Optio rules to see if they work.
Turn 1. Carthage.
Hannibal leads the skirmishers forwards to engage the velites. Skirmishers and HI are one command and the thin line is in command since it is directly behind the skirmisher line commanded by Hannibal, but Hannibal's LI move 2 squares, leaving the HI behind and now out of command (as planned).
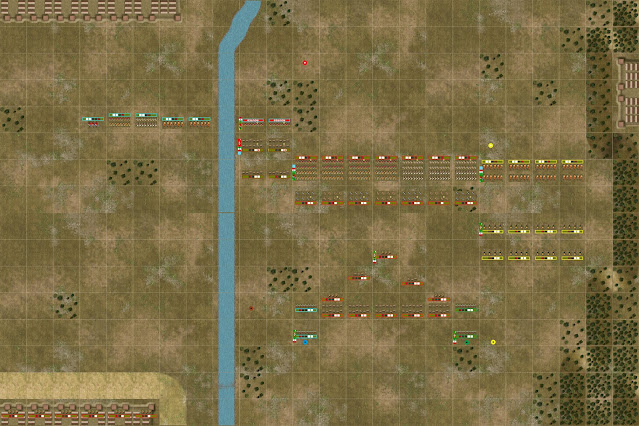
The Gallic and Iberian cavalry advance at full speed to engage the Roman horse. They're slowed down a bit by the scrub from 3 squares movement to 2.
Turn 2. Rome.
On they come, slowwww and steady....
Turn 2. Carthage.
On they come, fast and furious. The slingers are now in range and let loose with sling bullets.
Turn 3. Rome.
The Romans keep coming and now all skirmisher units and velites are engaged in missile fire.
Turn 3. Carthage.
Chaaarge! In go the Gallic and Iberian cavalry. They must crush the Roman cavalry as quickly as possible, but how to do that since the rear ranks give no support?
Turn 3. Melee.
Cavalry units on both sides rapidly wear each other down (cavalry vs cavalry combat is resolved twice). The cavalry commanders Paullus and Hasdrubal are thus far uninjured.
The Roman cavalry break off after melee to buy time.
Turn 4. Rome.
The Romans pause in their advance to let the LI fight to exhaustion. Meanwhile the Roman cavalry dismount to fight on foot. That will give them an advantage against the Gallic and Iberian cavalry in melee.
Turn 4. Carthage.
Nothing for it but to let the Gallic and Iberian horsemen dismount in turn. Actually, that was the plan. 😁 The Gauls and Iberians, unlike the Romans, have their dismounted infantry in depth - units of 2 ranks - which will give them rear-rank support in melee. Nice one, Hannibal!
Hannibal, having returned to the first line, begins to lead the Iberians and Celts forward to form a giant wedge.
Turn 5. Rome.
The Gallic and Iberian dismounted foot are shot down a morale interval. Not looking good....
Turn 5. Carthage.
The Gallic and Iberian dismounted foot charge. They have better combat factors in charge against Romans so win the fight and knock the Roman morale down an interval. The two sides are even again. Tough fight....
Hannibal meanwhile has completed the wedge.
Turn 5. Melee.
The dismounted units would mutually rout each other and so neither side loses morale. Both sides obligatorily break off after melee combat. But in the desperate fighting Hasdrubal has been wounded!
Turn 6. Rome.
The dismounted Gauls and Spanish shoot the dismounted Romans to rout. Seeing this, Paullus orders the velites to be withdrawn and the legions to resume their advance. The right flank is lost and the Roman infantry must waste no time engaging the Carthaginian centre.
Paullus survives and moves to the legions.
Turn 6. Carthage.
The Gallic and Iberian cavalry form column and head for the other flank at double-speed.
No melee this turn so
Turn 7. Rome.
The Allied cavalry begin to pull back to avoid encirclement. Meanwhile the legions plough ahead. This is the only card Paullus and Varro have left to play.
Turn 7. Carthage.
The Numidian LH move up to engage the Allied horse whilst the Gallic and Iberian cavalry continue their grand tactical manoeuvre.
Turn 8. Rome.
On come the legions and back go the Carthaginian skirmishers as well as the Allied cavalry. Cannae isn't a hill they plan to die on.
Turn 8. Carthage.
The Carthaginian MC form line and join the Numidian LC to envelope the Allied horse. This separates the frontmost units of the Gallic and Iberian cavalry from the rest of the column which falls out of command and can't move this turn in consequence.
Turn 9. Rome.
The Allied cavalry, with nothing to lose, charge the Numidian LH and the legions drive the Carthaginian skirmishers back and charge the tip of the infantry wedge.
Turn 9. Carthage.
Hannibal falls back to the second line whilst the rear line of Numidian LH falls back, to give space to the front line of LH to break off if necessary. The Gallic and Iberian cavalry flank charge the Allied cavalry unit on the right of the line and continue to gift wrap the rest of the Allied horse. I had forgotten to advance the Romans on the other side of the river during their move so do it now.
Turn 9. Melee.
The flanked Allied cavalry unit routs but the rest of the Numidians take a beating. The unit at the tip of the Carthaginian wedge loses morale but is composed of the best Gallic and Iberian troops and will take a while to defeat.
The Numidian LH break off after melee except for the unit that occupies the square vacated by the routed Allied cavalry unit.
Turn 10. Rome.
The surviving Allied horse pull back at full speed to avoid being encircled whilst the legions press on. The fate of Rome depends on them!
Turn 10. Carthage.
Carthaginian LH and MC move up against the Allied horse whilst the rest of the Carthaginian cavalry move towards the legions. They are uncommanded so can move only one square per turn. Meanwhile some Carthaginian skirmishers are shot to rout by the legions.
Turn 10. Melee.
The tip of the wedge continues to hold.
I forgot to record Turn 10 Melee and missed Turn 11 Rome (tricky when you're playing yourself - never know when it's your move) and went straight to
Turn 11. Carthage.
Gallic and Iberian cavalry flank charge a unit of Allied horse, disordering them.
Turn 11. Melee.
The first line of Gallic and Iberian infantry are drilled, hence able to fall back during melee instead of losing morale, which the frontmost unit of the wedge takes advantage of. Hannibal is successfully delaying the Roman advance.
Meanwhile the flanked Allied MC unit is routed.
The Allied commander survives the die throw and escapes to the next Allied horse unit.
Turn 12. Rome.
The legions charge the Libyan infantry and more of the wedge whilst the remaining Allied foot charge the Numidians. Death with glory!
Turn 12. Carthage.
The cavalry gradually approach the rear of the legions. Another unit of Allied cavalry is flank charged, becoming disordered.
Turn 12. Melee.
The Allied cavalry unit is routed but so is one of the Numidian LH units.
The victorious units occupy the squares of the routers.
Turn 13. Rome.
The Romans press on. What else can they do?
Turn 13. Carthage.
The last Allied mounted unit is surrounded whilst the Gallic and Iberian MC approach the Roman rear.
Turn 13. Melee.
The wedge falls back and is now completely flattened.
Turn 14. Rome.
The legions press forward. Their only hope is to crush the Carthaginian HI before them.
Turn 14. Carthage.
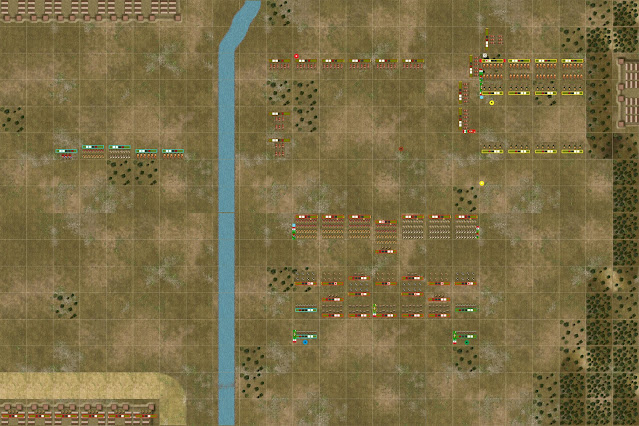
Whilst the Carthaginian MC and LH swarm around the last Allied mounted unit the remaining cavalry approaches the rear of the legions. The uncommitted Libyan foot begin their outflanking manoeuvre against the flanks of the legionary line....
Turn 14. Melee.
A Numidian LH unit is routed as is the centre of the former wedge.
The routed units are removed.
Turn 15. Rome.
The last two unengaged legion units charge. The entire line is now locked in battle.
Turn 15. Carthage.
Gallic and Iberian cavalry charge the rear of the Allied cavalry unit and rout it, whilst other cavalry continue to advance towards the rear of the legions. Meanwhile the Libyans have already reached the rear of the legions. Things are not looking good for Rome....
And that is the end of the Roman cavalry.
Turn 16. Rome.
On, on, noble sons of Romulus! And time for some line relief to get fresh noble sons into the fight.
Seems I missed Turn 16 Carthage. Oh well....
Turn 16. Melee.
The Carthaginian first line is being ground down. Commanders dice for possible injury but are unwounded.
Turn 17. Rome.
The Roman force across the Aufidus gradually approaches the Carthaginian camp.
Turn 17. Carthage.
The Libyan veterans charge the rear of the legions and rout them, whilst the Carthaginian cavalry finally reaches the Roman rear and starts shooting it up.
Victorious adjacent Carthaginian units get a morale boost....
....and the Roman line starts contracting.
Think I missed melee again. Damn!
Turn 18. Rome.
More legion units execute line relief. The fighting is hard and merciless.
Turn 18. Carthage.
Chaaarge! The Celts and Iberians rear-end the legions, knocking a morale interval off them, whilst the Libyans form column and face the flanks of the Roman line, ready to form line again and flank charge them.
The cavalry break off immediately after the charge. Cavalry have that privilege when engaging infantry.
Turn 18. Melee.
Two more units of the Carthaginian first line rout. The first line has nearly been destroyed.
The routed units are removed and a Roman commander is wounded! All surviving Roman officers are now injured.
Turn 19. Rome.
The Romans trundle towards the Carthaginian camp.
Turn 19. Carthage.
The Carthaginian cavalry charge the Roman rear again. This is how MC generally operated against HI: charge and break off, charge and break off.
The cavalry duly break off. They should have gone back a full square but never mind.
Turn 19. Melee.
The centre of the Gallic second line is severely battered and falls back to avoid routing.
Turn 20. Rome.
As the Romans draw near to the Carthaginian camp, the Gallic and Iberian cavalry shoot up the legions and succeed in knocking off a morale interval off them.
Turn 20. Carthage.
Another cavalry charge and two legionary units rout. The Roman line is disintegrating.
Gauls occupy the vacated squares, splitting the legions into three groups.
The cavalry break off after their charge.
Turn 20. Melee.
The Carthaginian centre falls back again. Will the central legions break through and escape?
Turn 21. Rome.
Let's at least get Hannibal's camp, boys!
Turn 21. Carthage.
More cavalry charges and flank charges by the Libyans. The surviving legions are close to routing.
Turn 21. Melee.
The cavalry do not break off this time. Two legion units rout but so do the Gauls in the centre.
Officers survive the dice throws....
....and the routers leave or die.
Turn 22. Rome.
The central legions continue to advance, forcing the Carthaginian skirmishers to give way before them. Will the Romans escape?
Turn 22. Carthage.
No, they won't. They are charged in the rear by the Gallic and Iberian cavalry and lose a morale....
Turn 22. Melee.
....and are routed in the subsequent melee. That still leaves the Romans on the other side of the river, but in Optio if ¾ of an army are lost then the remaining units automatically rout. In fact the ¾ mark had been reached some time back, but I wanted to see how the encirclement of the legions would play out. I'd say it was reasonably historical, no?
Anyhow, game over!
Job well done, lads!










I'd call that a successful trial - most impressive. I'd not heard before about a couple of the Roman legions being the 'wrong' side of the river.
ReplyDeleteThanks Rob (and happy New Year :-)). Yes, there were two legions (10,000 men) in front of the main Roman camp who advanced on the Carthaginian camp but did not take it.
ReplyDelete